Save
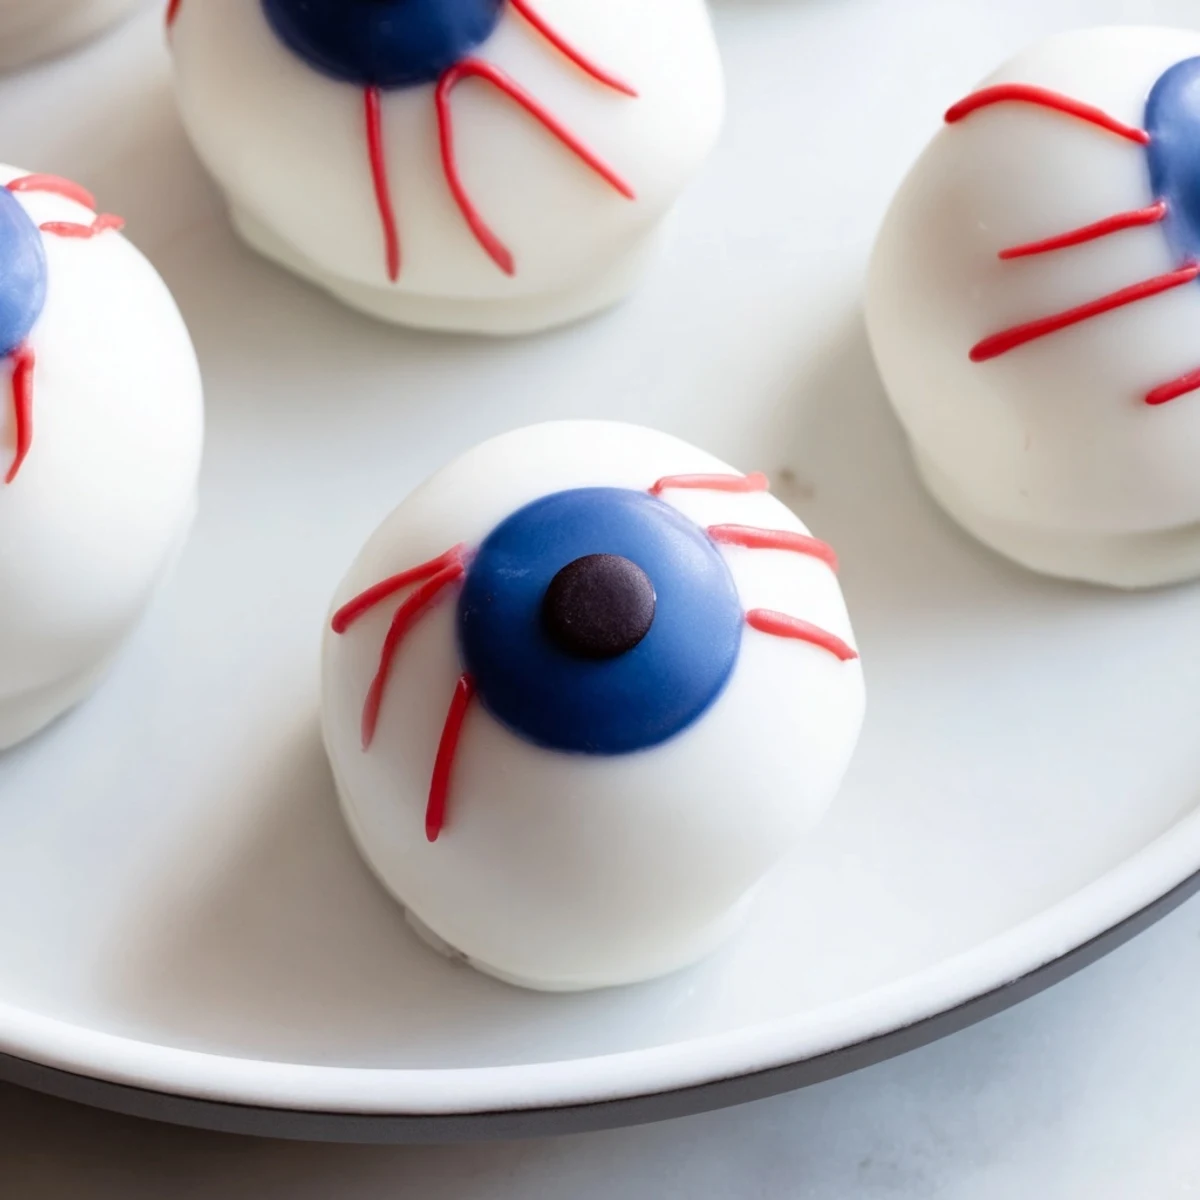
Save These creepy eyeball-shaped cake bites combine crumbled vanilla cake with rich cream cheese frosting, hand-rolled into spheres and coated in smooth white chocolate. Each treat features a colorful iris made from candy melts in blue or green, complete with a dark pupil and dramatic red gel veins for that authentic spooky look. The process involves baking a simple vanilla cake, crumbling it once cooled, mixing with the prepared frosting, rolling into uniform balls, chilling until firm, then dipping and decorating with various chocolate coatings. These handheld delights deliver the perfect balance of sweet cake and creamy frosting in every bite.
My daughter's Halloween class party had me scrambling last October until I remembered those creepy cake eyeballs I'd seen online. We ended up making them together at the kitchen island, chocolate smeared on our cheeks and red gel coloring everywhere. The other kids went absolutely wild for them, and now they're requested every single year without fail.
Last year I made three dozen for our neighborhood potluck and watched grown adults hesitate before finally trying one. The best part was seeing their expressions change from mild concern to delighted surprise after that first bite.
Ingredients
- 1 box vanilla cake mix (or 400 g homemade vanilla cake): The foundation that gets transformed into something delightfully gruesome
- 3 large eggs: Essential for binding the cake structure properly
- 120 ml vegetable oil: Keeps the cake base moist and tender
- 240 ml water: Helps achieve the right cake batter consistency
- 100 g cream cheese, softened: Adds tangy richness to the filling
- 100 g unsalted butter, softened: Creates that creamy frosting texture
- 200 g powdered sugar: Sweetens and binds the mixture together
- 1 tsp vanilla extract: Classic flavor that pairs perfectly with chocolate
- 400 g white chocolate or white candy melts: The base coating for your eyeballs
- 50 g dark chocolate or black candy melts: Essential for creating those pupils
- 50 g blue or green candy melts OR colored icing: Gives each eyeball its creepy iris
- Red gel food coloring or red decorating gel: The secret to those spooky veins
Instructions
- Bake your canvas:
- Preheat oven to 180°C (350°F) and prepare your vanilla cake according to package or recipe instructions, then let it cool completely until you can handle it comfortably.
- Create the crumble base:
- Break the cooled cake into fine crumbs using your hands or a food processor until it resembles sandy soil texture.
- Make the creamy binder:
- Beat together cream cheese, butter, powdered sugar, and vanilla until smooth and spreadable, about 2 minutes.
- Form the mixture:
- Mix frosting with cake crumbs until combined and the mixture holds together when pressed, then scoop tablespoons and roll into 24 balls.
- Chill for success:
- Place balls on parchment paper and freeze for 20 minutes so they firm up enough for dipping without falling apart.
- Coat in white:
- Melt white chocolate gently and dip each ball, fully enrobing it before returning to the tray with a swift, confident motion.
- Add the iris:
- While coating is still soft, pipe or dip a small amount of colored candy melt onto the center of each ball.
- Create the pupil:
- Once the iris sets, add a small dot of dark chocolate or black candy melt right in the center.
- Draw scary veins:
- Use red gel food coloring to create squiggly, irregular lines radiating from the iris for that authentic bloodshot look.
- Set and serve:
- Allow all decorations to firm completely before arranging them on your serving platter.
 Save
Save My niece actually asked if she could take one home in her goody bag, and when I said yes, she carefully wrapped it in a napkin like it was precious treasure. That's when I knew these spooky treats had become something special beyond just party food.
Making Them Ahead
You can prepare the cake balls and coat them in white chocolate up to two days before your event. Store them in an airtight container in the refrigerator, then add the colored details the day of serving for the freshest appearance.
Flavor Variations
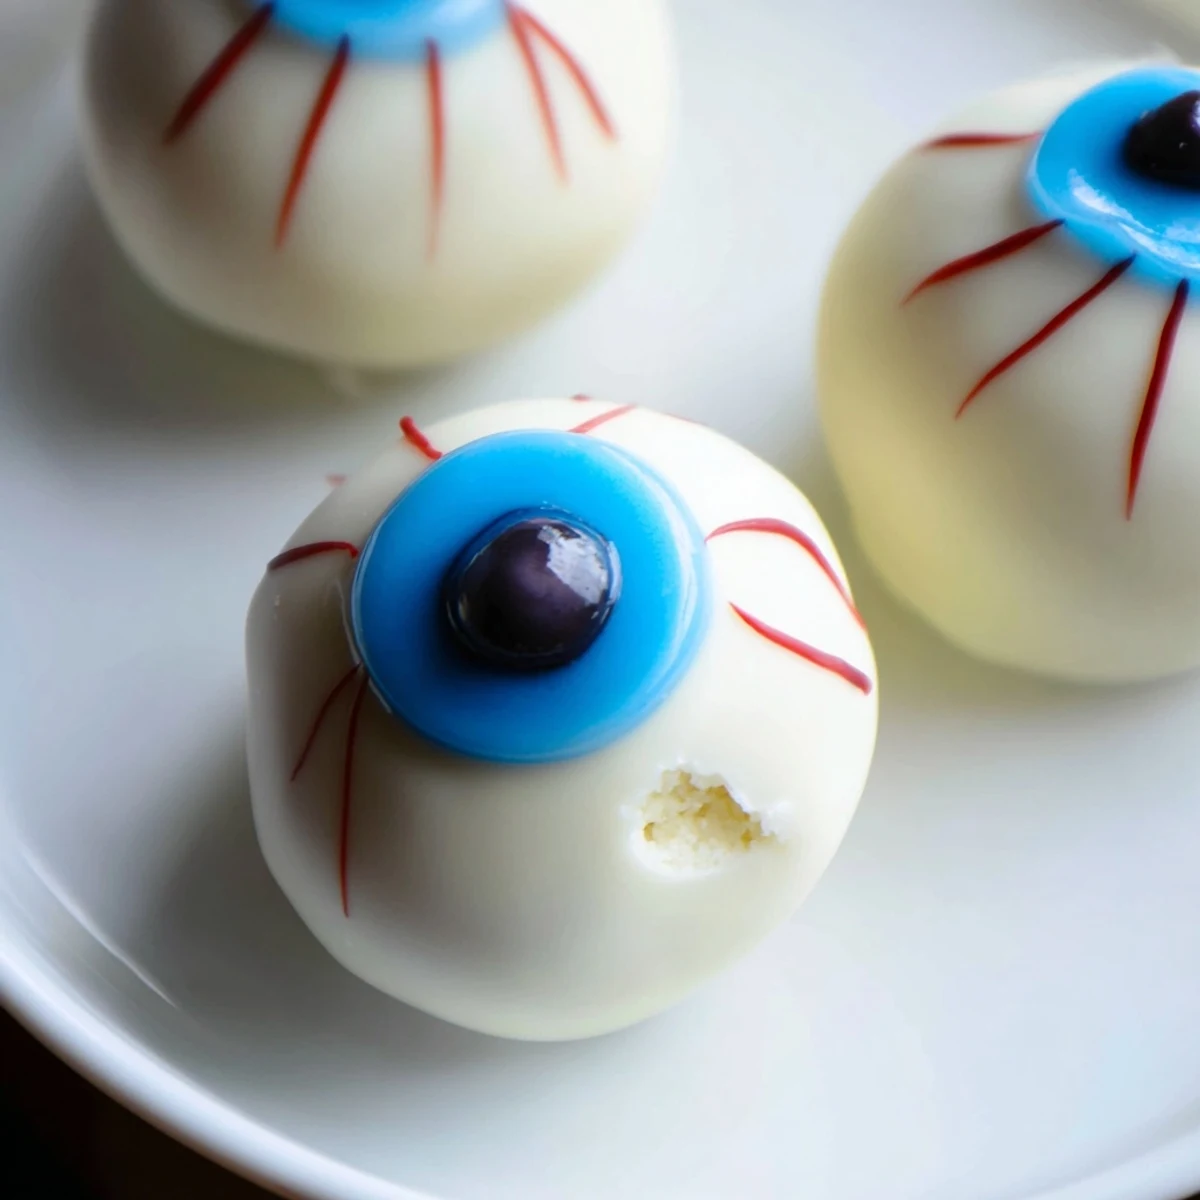
Try using chocolate cake instead of vanilla for a darker, more dramatic eyeball that contrasts beautifully with the white coating. A drop of cherry jam inside each ball creates a bloody surprise when someone takes their first bite.
Serving Display Ideas
Arrange the eyeballs on a bed of crushed chocolate cookies to look like dirt, or serve them in a clean shallow bowl labeled with a creepy sign.
- Insert toothpicks into some for easy grabbing at parties
- Group them in pairs on serving trays for extra creepiness
- Add plastic spiders around the display for atmosphere
 Save
Save There is something deeply satisfying about serving food that makes people gasp before they laugh and dig in. Happy haunting!
Recipe FAQs
- → How long can I store these eyeball treats?
-
Store in an airtight container in the refrigerator for up to 5 days. The chilled texture helps maintain their shape and keeps the chocolate coating firm.
- → Can I make these ahead of time for a Halloween party?
-
Absolutely! Prepare the cake balls and chill them up to 2 days before dipping and decorating. The undecorated balls freeze well for up to 2 weeks.
- → What's the best way to melt the chocolate for coating?
-
Use the microwave in 30-second intervals, stirring between each, or use a double boiler on the stove. The chocolate should be smooth and fluid but not overheated.
- → Do I need cake pop sticks for these?
-
Sticks are optional! These work perfectly as handheld bites without sticks. If using sticks, insert them before the chocolate coating sets completely.
- → Can I use different cake flavors instead of vanilla?
-
Yes! Chocolate, red velvet, or even Funfetti cake work wonderfully. The darker cakes create a more dramatic contrast when you bite into them.
- → How do I prevent the coating from cracking?
-
Ensure the cake balls are thoroughly chilled before dipping and work in a cool room. If the coating is too thick, add a teaspoon of vegetable oil to thin it.